Scheduling a livestream in Switchboard Live now takes fewer clicks. Your dashboard shows upcoming events with a Go live button, start times can be typed, and every destination tells you what's wrong and how to fix it.
Most livestreams start well before anyone clicks Go live. Someone picks a time, chooses the platforms, checks that every connection still works, and then has to find that event again on the day.
We refreshed each of those steps in Switchboard Live, so you can schedule a livestream with fewer clicks and less guessing. The flow is the same two steps you already know: add your details, then pick your destinations. What changed is how clearly each step shows what will happen on every platform.
Here's what's new, starting with the place you'll notice it first.
Your next event, right on the dashboard
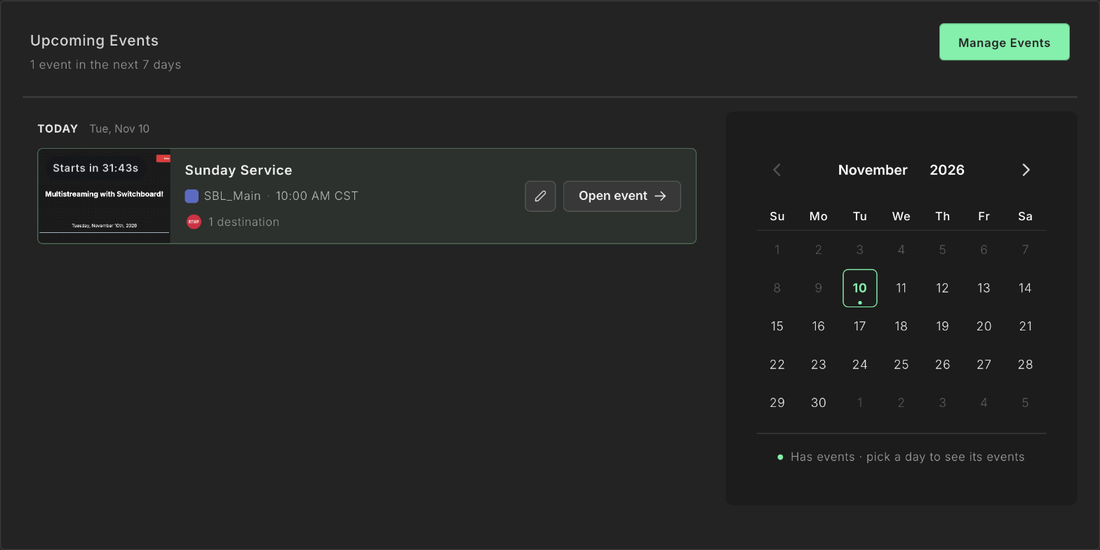
Getting to an upcoming event used to mean going to Workflows, opening the right workflow, then switching to the Scheduled tab. Now your dashboard shows it the moment you log in.
Upcoming Events lists everything scheduled for the next 7 days, grouped under Today and This week. Each card shows the workflow, the start time with its time zone, and the destinations the event goes to.
Go live from the card
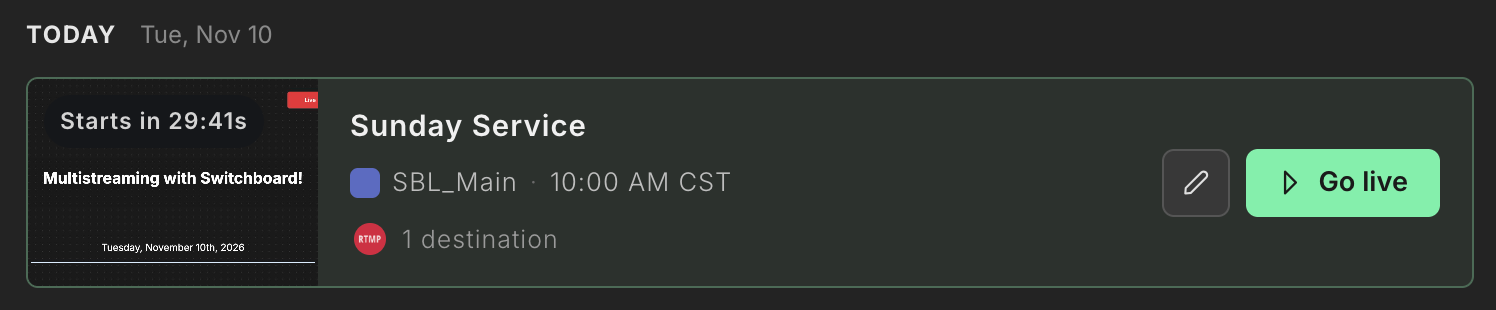
Click Open event to jump into the event inside its workflow, or click the pencil (or the thumbnail) to edit it. Shortly before the start time, the card turns green and the button becomes Go live.
Scheduled events still need someone to click Go live at the start time, so having that button on the dashboard saves steps right when it counts.
A calendar for the month
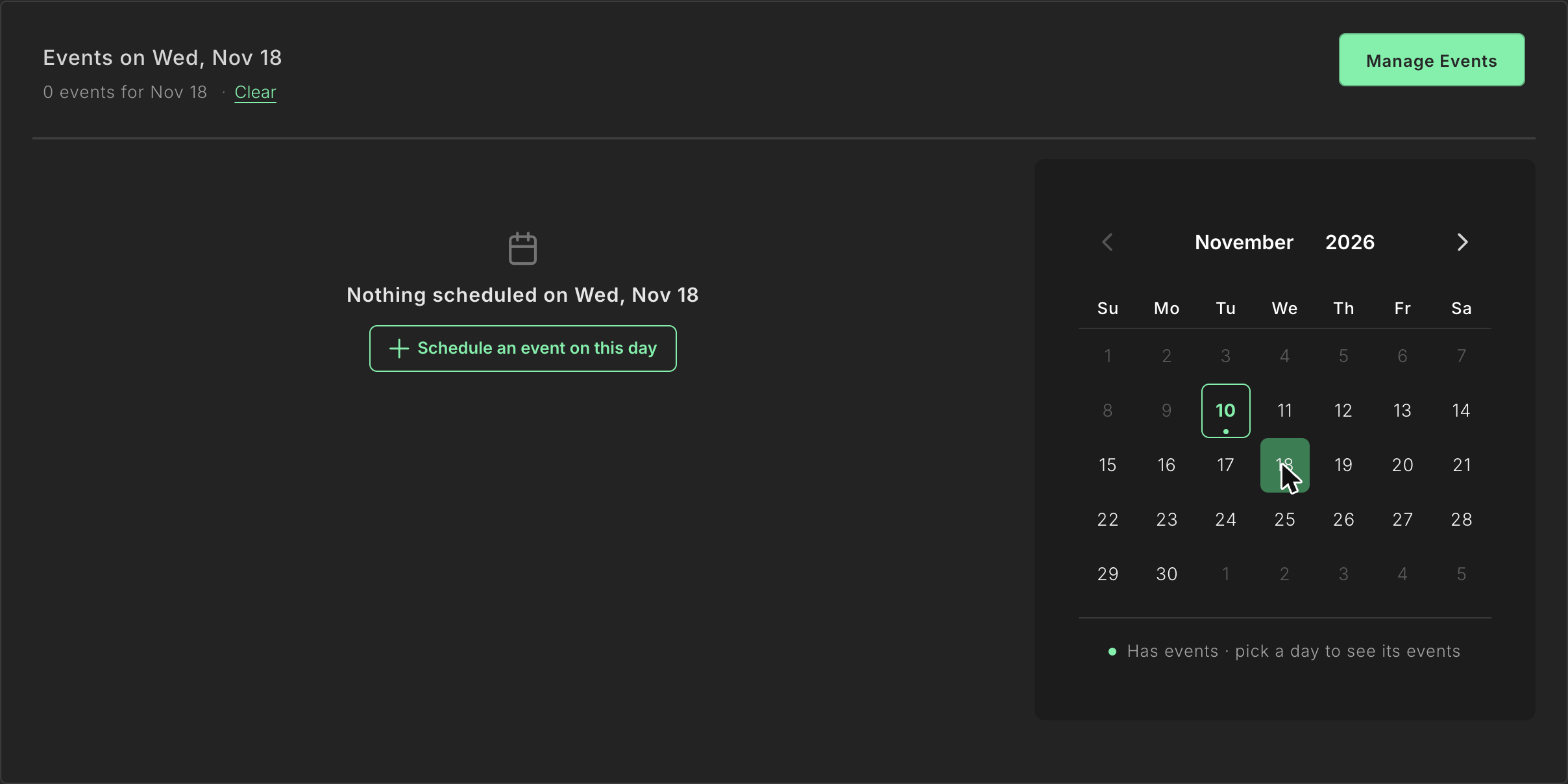
Next to the list, a calendar shows the month at a glance. Days with events have a green dot, today is outlined, and past days are greyed out.
Click any day to see only that day's events, then click Clear to go back to the full list. If the day you pick is empty, click Schedule an event on this day and the scheduling window opens with that date already filled in.
Scheduling an event takes fewer clicks
Pick what you're creating
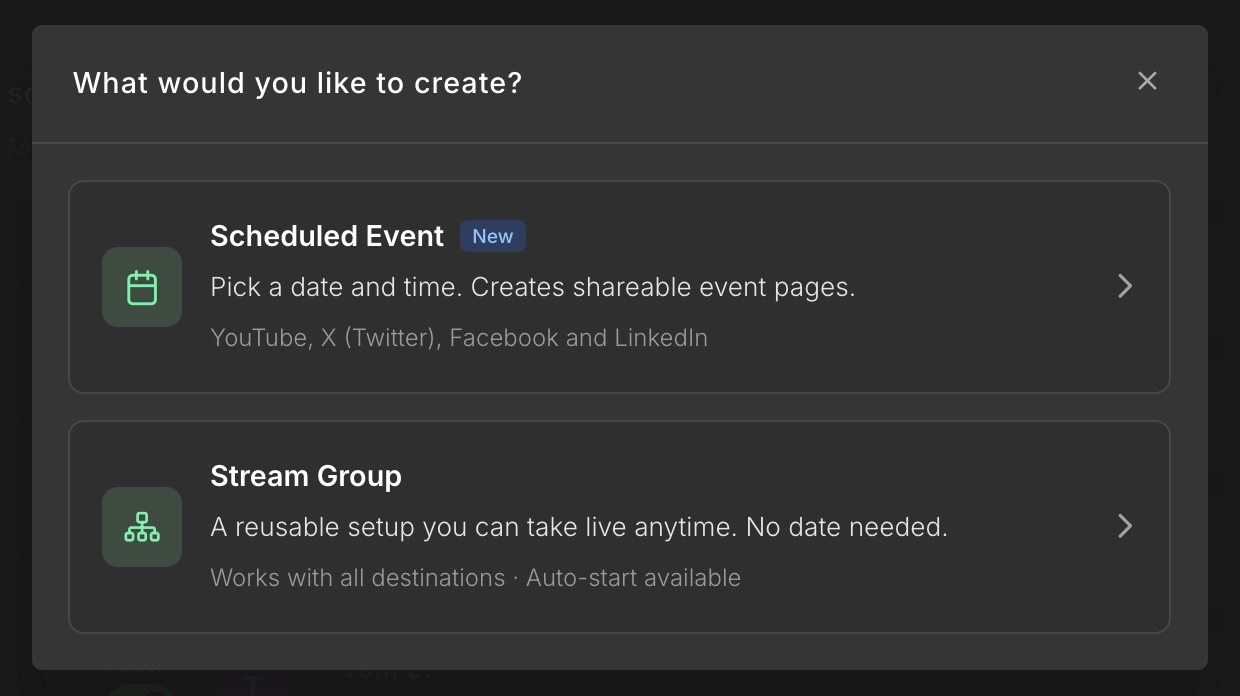
Clicking Create New in a workflow still opens the same chooser, now with a clearer description of each option:
- Scheduled Event: a livestream with a set date and time. It creates shareable event pages on YouTube, X, Facebook and LinkedIn, so your audience can find it before you go live.
- Stream Group: a reusable setup you can take live any time. No date needed, and it can start automatically.
If you stream the same council meeting or Sunday service every week, a Stream Group is the setup you reuse. If you want people to find, save and share the livestream ahead of time, schedule an event.
Your details, in two clear parts
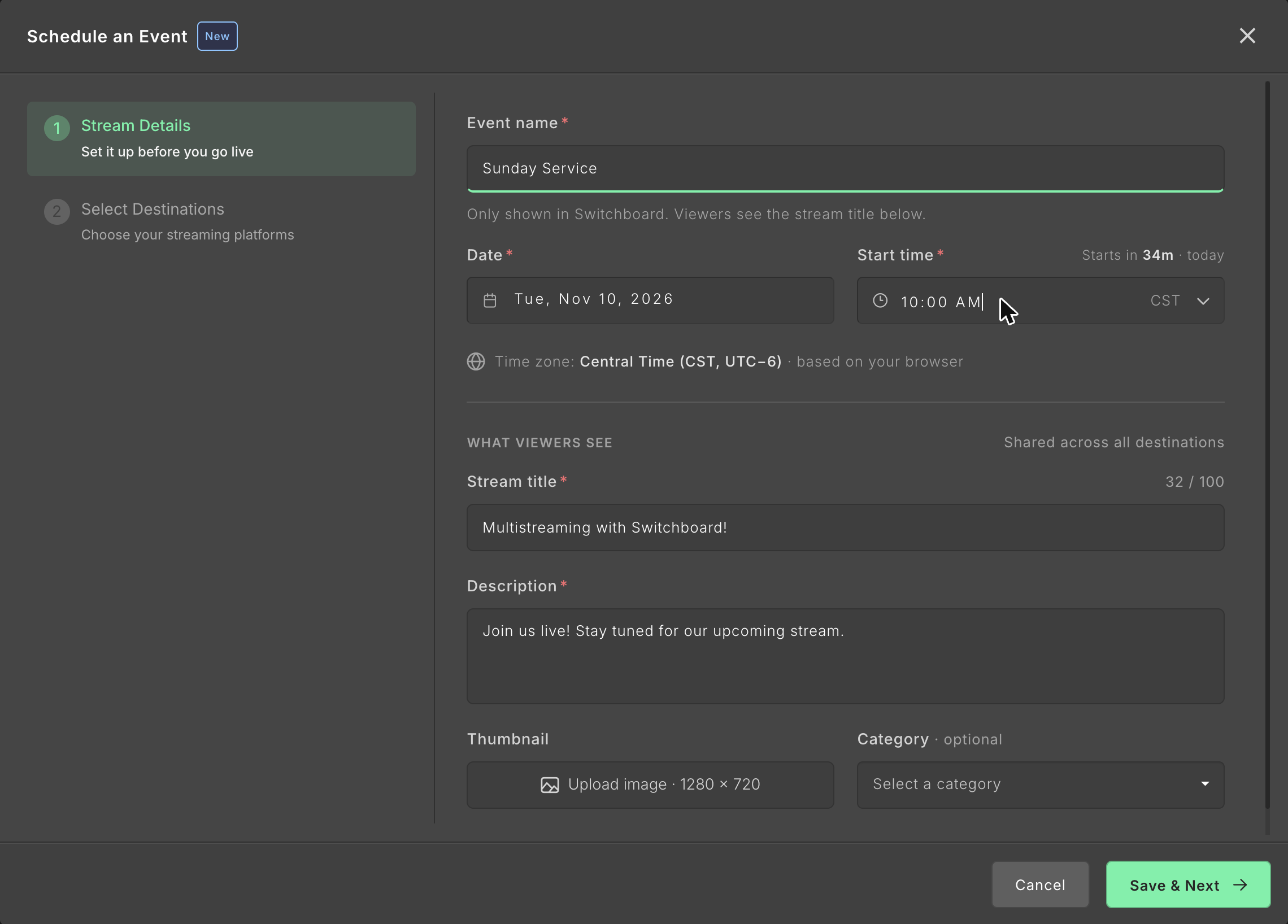
The first step is now split into Event (the internal name, date and time) and What viewers see (title, description, thumbnail and category). A short note under the event name reminds you that only the stream title is public, so you can name events however your team likes.
Type your start time
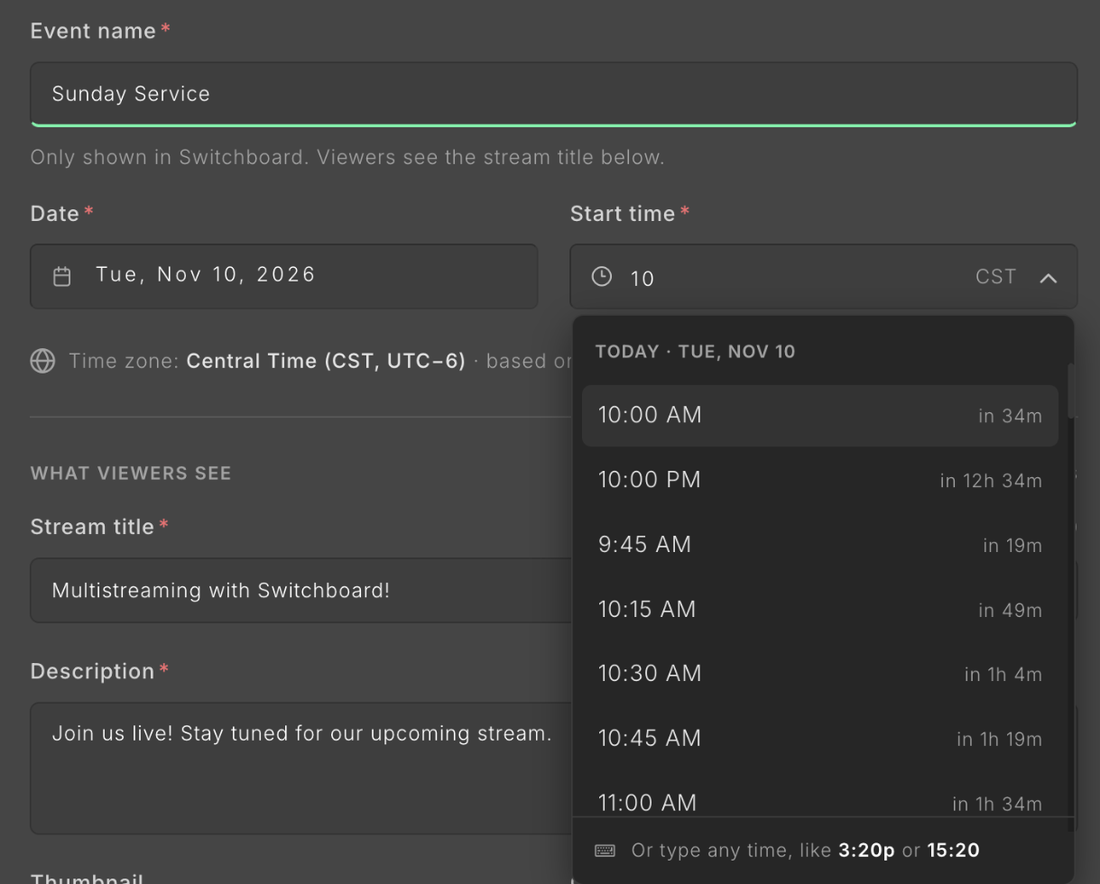
The hour and minute spinner is gone. Click the start time and type, or pick from the list:
- Type "10" and you'll see 10:00 AM along with the nearest times. Formats like 3:20p, 320p and 15:20 all work.
- For today, the list only shows times that haven't passed yet, each with a countdown ("in 34m").
- Once you pick a time, a note confirms it: "Starts in 34m · today."
- The list opens over the window, so it's never cut off on a smaller laptop screen.
Always know which time zone you're in
A line under the date and time now reads, for example, "Time zone: Central Time (CST, UTC−6) · based on your browser." If your team works across time zones, you'll know exactly which time you're setting before you save.
LinkedIn events lock the date and time
LinkedIn doesn't allow scheduled livestreams to be rescheduled. When LinkedIn is one of your destinations, the date and time lock, with a note that explains why. To change the time, remove LinkedIn from the event first.
Stream groups get the same clear layout
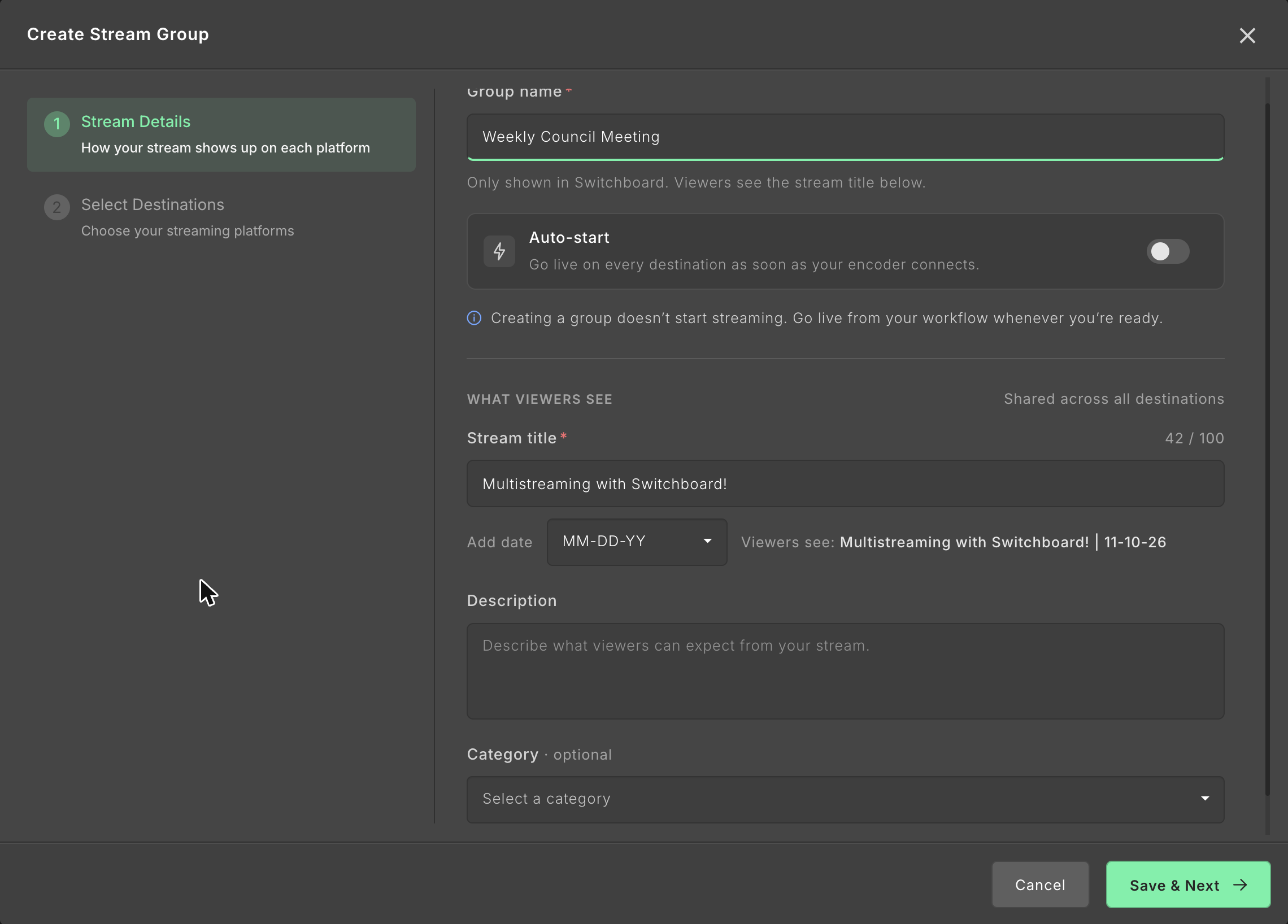
Creating or editing a stream group now follows the same layout as a scheduled event, without the date and time. A few details make recurring setups easier to manage:
- Auto-start has its own card, with a plain explanation of what it does: "Go live on every destination as soon as your encoder connects." Turn it on when you want your livestream to start the moment your hardware does.
- Creating a group doesn't start streaming. A note under the group name makes this clear, so you can set things up ahead of time without worrying about going live by accident.
- Add the date to your stream title. Pick a date format and Switchboard Live adds it to the end of the title, with a live preview of what viewers will see, like "Multistreaming with Switchboard! | 11-10-26." It's a small touch that keeps weekly meetings easy to tell apart on YouTube and Facebook.
Destinations that tell you what's going on
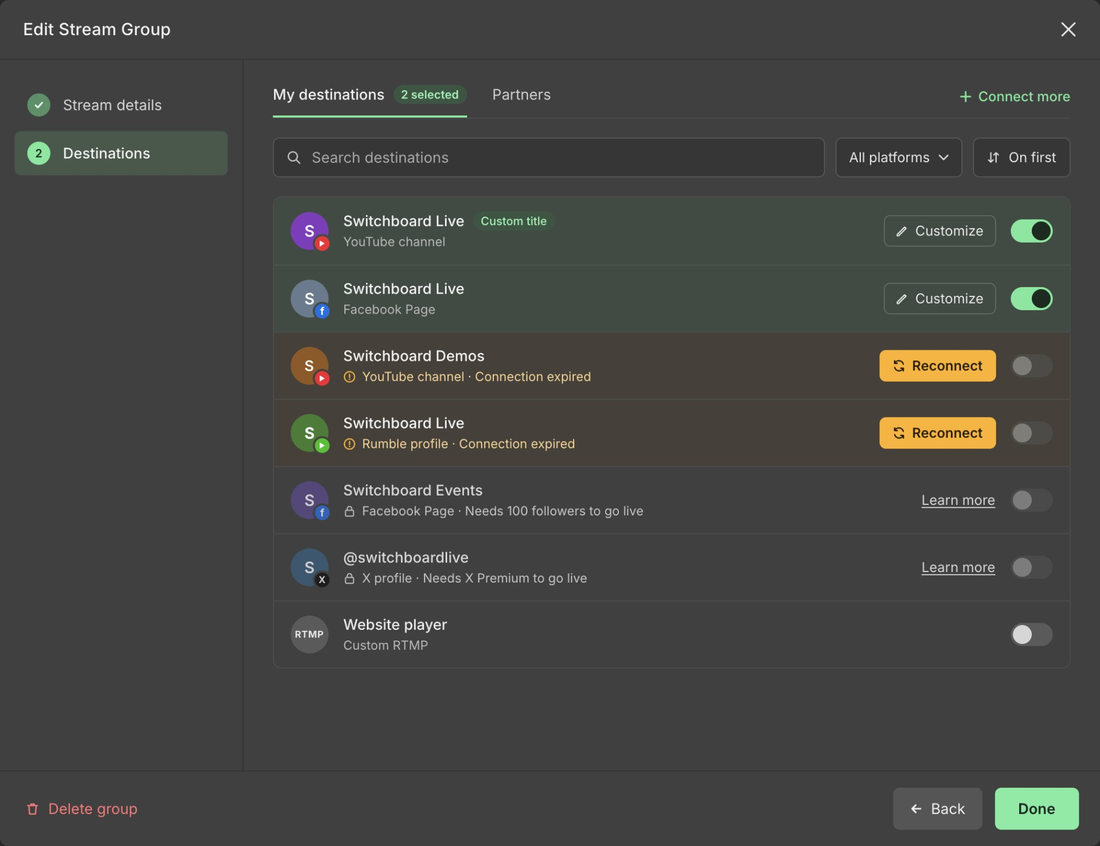
The second step works the same for scheduled events and stream groups: one list of your destinations, each with its own toggle. The tab shows how many you've selected, and you can search, filter by platform and sort the list, which helps once you have a dozen channels connected.
Problems come with the fix
A destination that can't go live now says why, and what to do about it:
- Connection expired: the row turns amber and shows a Reconnect button. One click and you're back.
- Platform restriction: a lock icon and the platform's rule, like "Needs 100 followers to go live" on a Facebook Page or "Needs X Premium to go live" on X, with a Learn more link.
No more toggling a destination on and off, wondering why it won't stick.
Event pages are explained up front
For scheduled events, a note at the top of the list explains what each destination will do. Turning on YouTube, Facebook, LinkedIn or X creates a public event page right away, so your audience can find it before you go live. Custom RTMP destinations, like a website player, simply go live at the start time.
Creating that page on the platform takes a few seconds. While it happens, the row shows a progress bar ("Creating your YouTube event…") and the buttons wait until it's done, so nothing gets saved halfway.
Removing a destination asks first
If a destination already has an event page, turning it off opens a quick confirmation. A checkbox, unchecked by default, asks whether to also delete the event on that platform. Leave it unchecked and the public page stays up for anyone who saved the link. Check it and the page comes down too.
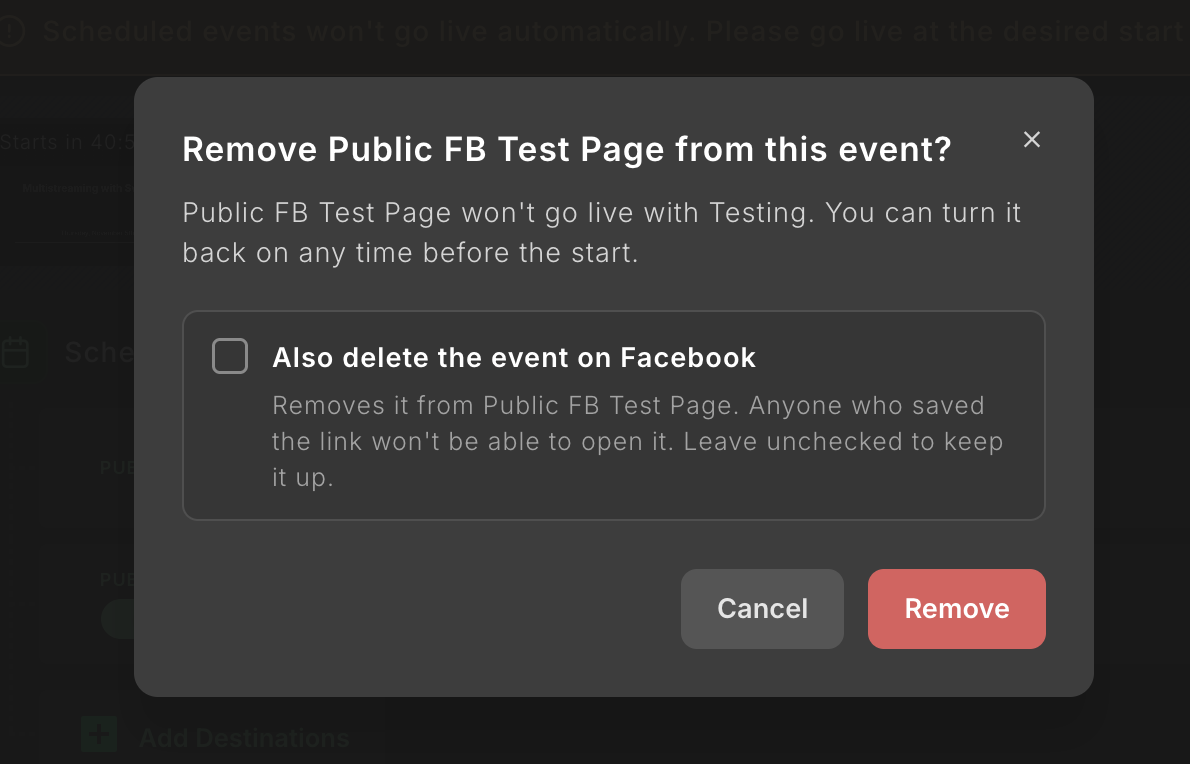
You can turn the destination back on any time before the start. Custom RTMP destinations turn off without asking, since there's no public page to worry about.
Try it on your next event
All of this is live in your account now. The quickest way to see it is to open your dashboard, pick a day on the calendar and schedule your next meeting or service from there.
If you're new to scheduled events, our post on scheduling Facebook and X broadcasts ahead of time covers how event pages work on each platform.
Questions, or something not looking right? Reach out to our team and we'll take a look.